File Sharing with Qemu and Virt-Manager
SergeantBiggs
system administrationlinuxarchlinuxfedoravirtualizationqemulibvirtvirt-managerwindowstechnology
1171 Words
2022-03-09 13:52 +0000
I’ve been using qemu and libvirt to create and manage virtual machines under Linux. I’m using Virtual Machine Manager to graphically manage the machines. I’ve been really impressed with qemu + KVM performanace, and Virt-Manager provides a very nice and easy to use interface. There is just one thing lacking, in comparison to “traditional” desktop virtualization software (eg. Virtualbox): there is no pre-configured way to share files between the host and the guest. In contrast, Virtualbox provides a really easy way to transfer files. As long as the agent is installed you can just “copy and paste” them over, or drag them into the VM from the host (and vice versa). In this article, I’ll try to configure an easy way to share files between the host and the VM. My host is an ArchLinux system, and the two guests are Fedora 35 and Windows 10. The steps in this article should be generic enough to “just work” on most other distros, but YMMV.
NB: This is intended as an easy way to share files for classic “desktop” virtualization settings. It’s not intended for servers, where there are multiple users on the host or the guests.
We’ll be using the same method for both guests, because it works on Linux and on Windows. Instead of the “traditional” way (sharing over the network with SMB, NFS, or 9p), we’ll we using a file system developed by libvirt called virtiofs. Virtiofs was developed for precisely this purpose (“Unlike existing approaches, it is designed to offer local file system semantics and performance.”). This makes file sharing easier to configure, since we don’t need to set up a server. It also should offer very good performance.
Host
To set this up, we first need a folder on the host.
This can be done in several ways. I decided to just create a folder in
/mnt, and change its ownership to my user:
sudo mkdir /mnt/vfs_share
sudo chown foo:foo /mnt/vfs_share
Then we need to add a virtiofs device.
Virtiofs needs shared memory to work. This can be enabled in the hardware configuration window. Navigate to Hardware -> Memory and select Enable shared memory.
After that, open virt-manager and navigate to the hardware settings of the virtual machine. Click on Add Hardware.
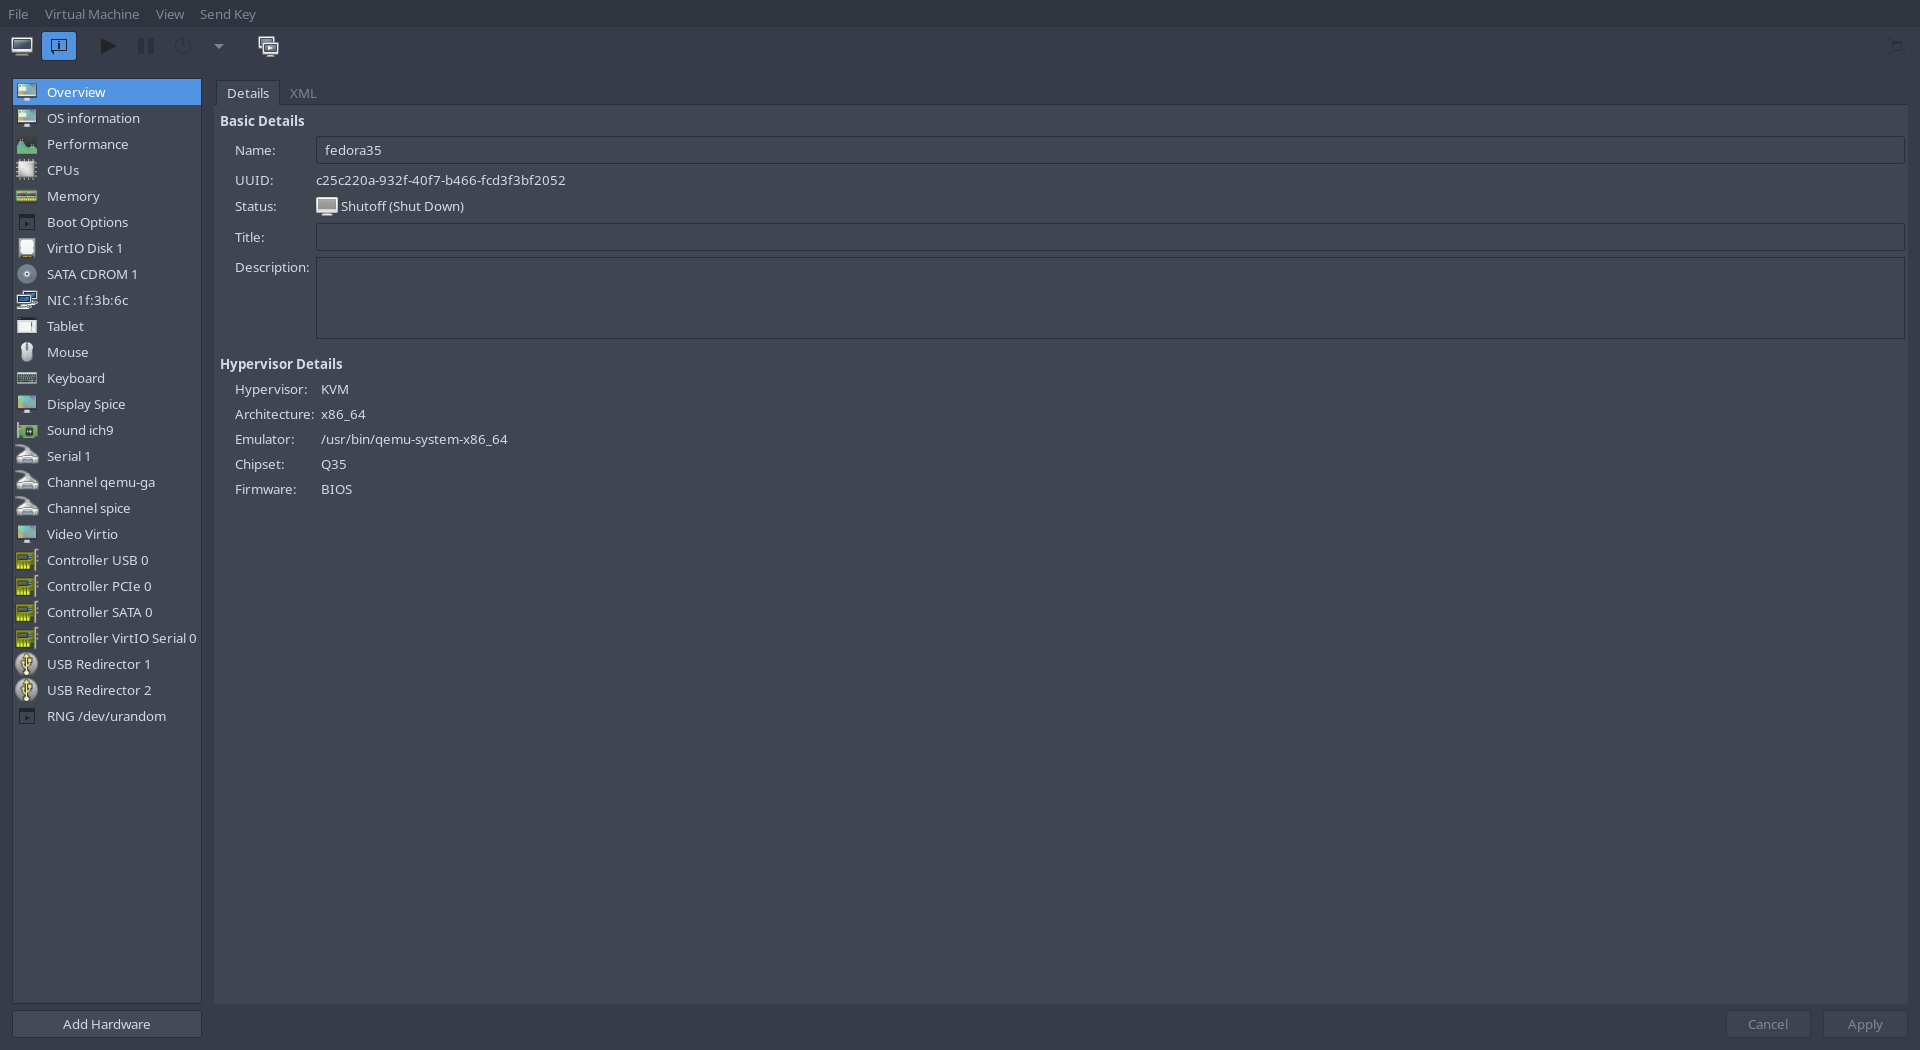
Virtual Machine Manager hardware configuration window.
A dialog box should pop up. In the pane on the left, click on Filesystem
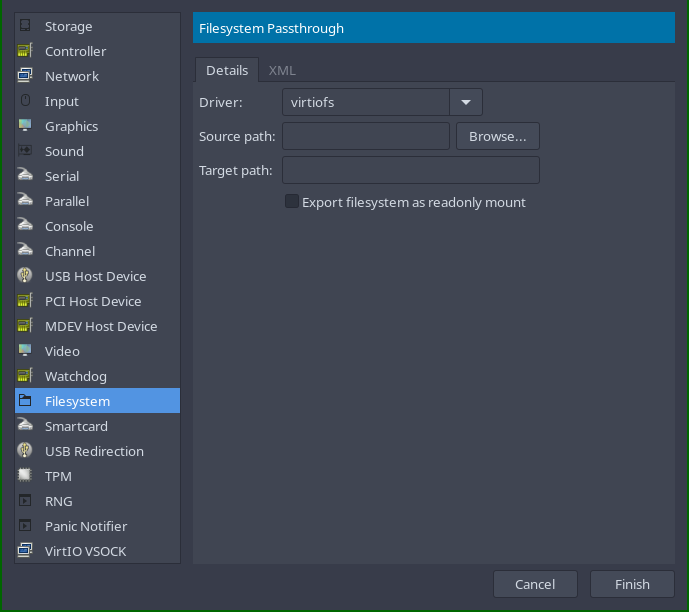
The ‘Add Hardware’ dialog window
Enter the necessary settings.
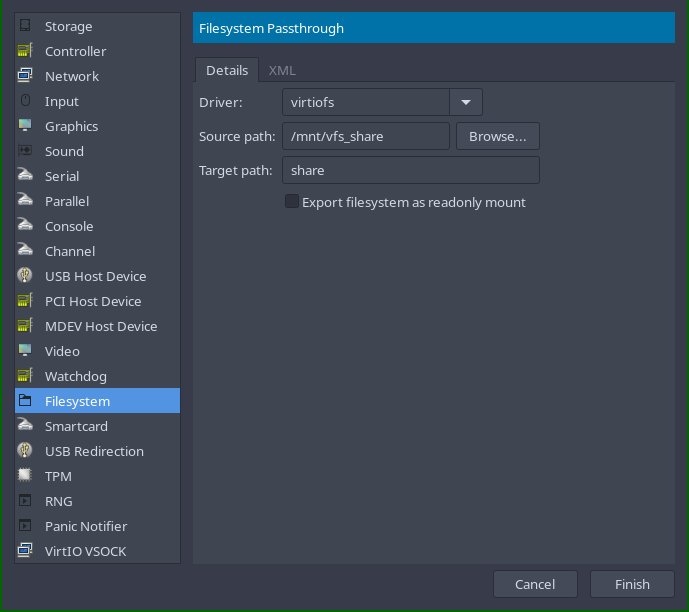
Filesystem options
The settings are as follows:
For the Driver, we keep the default (virtiofs). The source path is the path on our host filesystem. The target path is a bit of a misnomer. It’s not actually a path, just an identifier that we use as a mount point in our guest file system. This will become clear when we mount the file system in the guest later.
If you want a more detailed overview of these options and some alternatives, check out the libvirt knowledge base on virtiofs
Guest
Linux
After that, it’s time to configure the guest. First we create a folder in our users home directory that we will mount the share into.
mkdir ~/share
After that, we can mount the share with:
sudo mount -t virtiofs share /home/foo/share
If we want to make this permanent, we can just add an entry
to /etc/fstab
share /home/foo/share virtiofs defaults 0 0
After rebooting, the share should be mounted! If your user on the host and the
guest are the same, you don’t even need to worry about any other permissions.
Otherwise, change the folder with chmod to suit your needs.
Windows 10
Windows 10 can also use virtiofs, but it needs some additional work. First, we need to install 2 pieces of software:
- WinFSP
- Virtio drivers
This installation can be done in two ways: manually or with chocolatey.
Chocolatey
If you already have Chocolatey installed, it’s as simple as:
choco install virtio-drivers winfsp
If you don’t have Chocolatey installed, I highly recommend that you check it out. It’s a package manager for Windows that integrates quite well into the system. It makes maintaining software on Windows a lot easier! Installation instructions are here.
During the installation of the virtio-drivers it will pop up a dialog box asking if you trust the drivers. Confirm the dialog box to install them.
Manual install
Download WinFSP here and install it. The default options are fine if you just want to use the drivers.
After that, you need to download the latest ISO from the following archive. After downloading, mount the ISO. Then open Device Manager. Select the appropriate device. It should appear under Other devices as a Mass storage controller
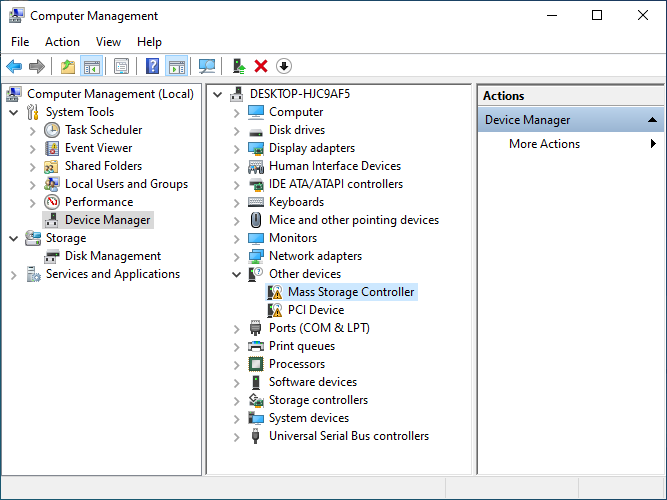
Device Manager
Right-click on the device and select Update driver. From that menu, select Browse my computer for drivers. Browse to the location of the ISO, and select the directory of the drivers.
Configuration
After that, it’s a good idea to create a service for the drivers, so they are automatically loaded during system startup.
sc.exe create VirtioFsSvc binpath="C:\ProgramData\Chocolatey\bin\virtiofs.exe" start=auto depend="WinFsp.Launcher/VirtioFsDrv" DisplayName="Virtio FS Service"
sc.exe start VirtioFsSvc
If you’ve installed manually, find the location of the .exe and change the binpath.
Benchmarks
All Benchmarks were done on a Dell Latitude 5401 with the following specs:
| Name | Value |
|---|---|
| CPU | Intel i5-9400H (8) @ 4.300GHz |
| GPU | Intel CoffeeLake-H GT2 [UHD Graphics 630] |
| Memory | 16 GB DDR4 |
| Storage | 512 GB NVMe |
Linux
For the benchmark, I simply copied over a 10 GB file with cp, measuring
it with time. That gave me the following result:
real    0m12.532s
user    0m0.002s
sys     0m5.785s
I also transferred the same file with rsync, to get a progress bar. That way
I could get a feel for the approximate speed of the transfer. The transfer
speed was around 250-300 MB/s consistently.
Windows
On Windows, I also copied the file in 2 ways. First using the windows File transfer dialog. I got up speeds of about 550-700 MB/s. After that, I tried the same using robocopy (A Microsoft tool for robust file copying).
-------------------------------------------------------------------------------
   ROBOCOPY     ::     Robust File Copy for Windows
-------------------------------------------------------------------------------

  Started : Friday, 11 March 2022 10:23:20
   Source : C:\Users\foo\Downloads\
     Dest = Z:\

    Files : *.*

  Options : *.* /DCOPY:DA /COPY:DAT /R:1000000 /W:30

------------------------------------------------------------------------------

                           1    C:\Users\foo\Downloads
100%        New File              10.0 g        10gig.img

------------------------------------------------------------------------------

               Total    Copied   Skipped  Mismatch    FAILED    Extras
    Dirs :         1         0         1         0         0         0
   Files :         1         1         0         0         0         2
   Bytes :  10.000 g  10.000 g         0         0         0   797.0 k
   Times :   0:00:18   0:00:18                       0:00:00   0:00:00


   Speed :           566020993 Bytes/sec.
   Speed :           32387.981 MegaBytes/min.
   Ended : Friday, 11 March 2022 10:23:39
Here we end up with roughly the same speed as the windows file dialog.
Conclusion
I’m very pleased with these results. The process of setting it up is quite easy (although not as “seamless” as the solutions Virtualbox and VMWare provide). The performance seems fantastic, at first glance. For now, I’m very happy with it. I will be testing this further. If I hit any snags or discover something else that’s interesting, I’ll let you know.