Printer Modification Part 1; making an enterprise-grade Printer from a €50 DeskJet
This is part 1 one of what will probably be a multipart series. I bought this DeskJet 3750 a few weeks ago. It can print and scan using a USB connection and over Wifi.

The printer in question. Apparently it’s the smallest all-in-one ever made!! Great! That’s going to make modding an absolute nightmare! Who the fuck would ever come up with such a stupid idea?
Generally I don’t like to stick random Wifi devices in my LAN, and certainly not proprietary devices that will probably never have their firmware updated. But I don’t want to drag this thing out of a closet every time I want to print something.
Luckily I have a solution for that! I have a small server sitting in my living room. It’s running Arch Linux (Of course, what else?). So if I can connect that printer to the Server via USB, I can then send print jobs to the server. So let’s get started doing that.
If you want to follow along, here’s what you need to have at home
- A HP DeskJet 3750
- A headless server, running Arch Linux (not technically necessary, but I will judge you if you use any other Distro)
- A USB Cable (A to B)
So, have you got all that stuff? Great, let’s begin.
We will be using a combination of Samba, CUPS and Nginx. We use hplip for the printer drivers. First we install the packages.
pacman -S cups samba nginx hplip
If you use Arch Linux, don’t forget to start and enable the services.
Let’s dive into the configuration files!
For CUPS, we can just leave the configuration file as is. We will be running the web server on localhost, and then access it using NGINX. Why, you ask? Don’t despair, dear reader. This will become apparent in just a few seconds.
I’ll include the NGINX configuration file. Maybe you can already guess it?
server {
    server_name cups.example.lan;
    listen 443 ssl http2;
    ssl_certificate /etc/ssl/cert.pem;
    ssl_certificate_key /etc/ssl/key.pem;

    auth_basic "CUPS Admin Interface";
    auth_basic_user_file cups_authfile;

    location / {
        proxy_set_header X-Forwarded-Host $host;
        proxy_set_header X-Forwarded-Server $host;
        proxy_set_header X-Forwarded-For $proxy_add_x_forwarded_for;
        proxy_pass http://localhost:631;
        proxy_http_version 1.1;
        proxy_pass_request_headers on;
        proxy_set_header Connection "keep-alive";
        proxy_store off;
    }
}
Yes reader, you guessed it correctly! If we run the CUPS web interface behind NGINX, we can protect it with a password. This is a handy way to protect web interfaces with passwords, and to unify your web interface configuration.
So, after we add CUPS behind NGINX, we can add the printer. I won’t show this in this post, because it is ridiculously easy to do.
After we’ve added the printer in cups, we can add it to Samba. Then we can use the printer from any Windows device in the network.
[DJ-Printer]
printing = CUPS
comment = HP DeskJet 3750 InkJet Printer
printer = HP_DeskJet_3700_series
path = /var/spool/samba
browseable = no
guest ok = no
writable = no
printable = yes
user client driver = yes
valid users = @users
Now we just need to install the drivers on windows. In these cases I always go for the “basic” or “professional” drivers, since they don’t have as much bloatware. The drivers for this particular printer can be found here
After installing the drivers, we can add the printer. The easiest
way to do this, is to go to Devices and Printers -> add a printer. In the next
screen, click on The printer that I want isn't listed
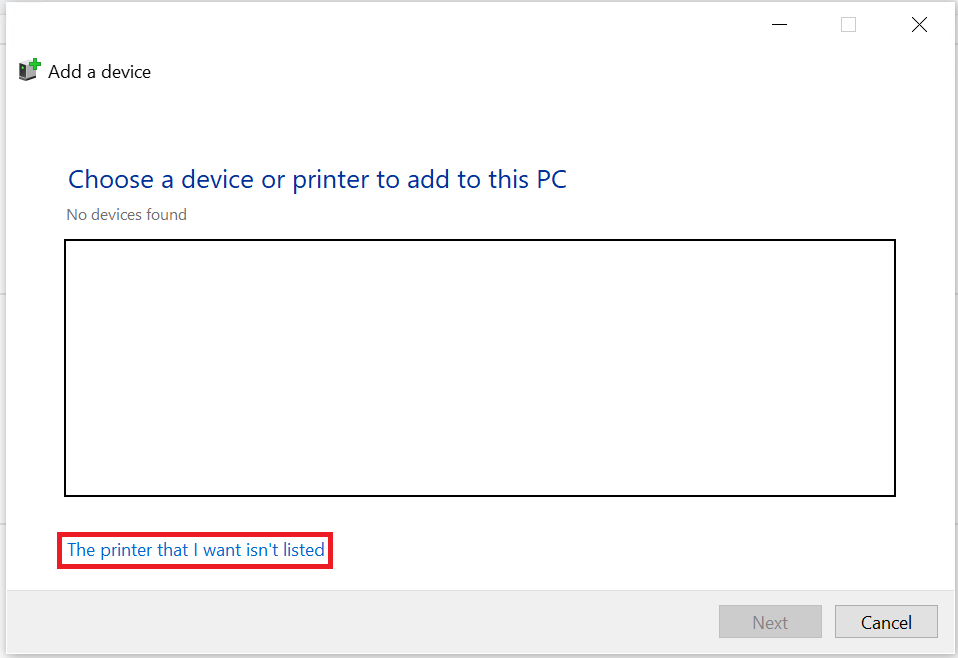
Printer selection dialog
After that click on Select a shared printer by name, and enter the name of
the printer in the form \\hostname\printer_name. The printer name is the “share
name” in the Samba configuration file (the one between square brackets). So in
our example it would be \\hostname\DJ-Printer. In the next step, Windows will
ask you to choose a driver. Just navigate the list and select the correct
manufacturer and driver.
And now we have a fully working network printer!
In the next part of this miniseries, I will talk about the scan function. We will be adding a scan share, and the ability to scan directly from the printer. This will involve some hardware mods, since the printer doesn’t have a scan button. Stay tuned!